Tuesday, June 28, 2011

Lacto-fermented Cauliflower

Pickling vegetables by means of lacto-fermentation is one of the easiest of all preserving processes. And best of all, this process keeps the pickles rich in beneficial bacteria. Because this is a brining process, which does not require water-bath canning, the pickles are crunchy, tasty, and good for your digestion.

To make these pickles you will need some wide-mouthed, one-quart sized canning jars, sea salt, and filtered or pure water. (We use our tap water, as we have a well and add no softeners or other additives.)

These annotated pictures illustrate the steps we follow:

Cut cauliflower into bite-sized pieces.


Then pack them tightly into one quart jars.

Add one Tablespoon of salt to each jar.
  
Fill jars with water, leaving about 3/4 inch of headspace,
as the vegetables and their juices expand slightly during fermentation.
Cap the jar tightly, and shake the jar briskly, to distribute the salt throughout the jar.
Store the jars at room temperature for several days, then store jars in a dark, cool spot, ideally at about 40 degrees. (Refrigerate if you expect to store them for a while.)

During the fermentation process, the liquid may get cloudy and bubble, and the jars give off quite a sulfurous odor, so we store ours on the screened porch.

Lacto-fermented vegetables increase in flavor over time, but they may be eaten after the initial room-temperature brining. The cauliflower will have a tangy flavor, reminiscent of the flavor of beer. And, like beer, it is an "acquired taste:" a bit surprising at first, but then quite addictive.

For a complete discussion of the nutritional benefits of lacto-fermentation see the book Wild Fermentation by Sandor Ellix Katz.


Friday, June 24, 2011

Small Batch Freezing

Although the process of freezing fresh produce is not that time consuming, it does produce a large number of pans, surfaces, and utensils to be cleaned up afterward. So what do we do when the amount of produce on hand doesn't seem to merit the commitment to making such a mess?
Today we harvested the secondary shoots of the broccoli plants we had recently harvested and frozen. There didn't seem to be enough broccoli to warrant a freezing project. But we also had some sugar snap peas ready to harvest, and then it became apparent that we could use the same water bath to blanch both vegetables.


Since broccoli leaves a strong flavor to the water it's boiled in, we decided to freeze the peas first. Sugar snaps have tough string in them, which doesn't soften during freezing or cooking, so I like to chop them into bite sized bits rather than freezing them whole.
While processing the peas, I soaked the broccoli in salted water to get rid of any caterpillars. Placing the weighted plate on the broccoli assures that it stays fully submerged in the water.
We ended up with three boxes of sugar snaps and two of broccoli. Not a large amount by our standards, but satisfying nonetheless.

Thursday, June 23, 2011

Garlic Scapes

      Towards the end of June here in Southern new England, your garlic plants will send up a tall stem that curls around like a pig's tail and ends with a long slender flower bud.
       You want to remove these scapes, as they are called, so that the plant puts its energy into the bulb, not the flower. Since last year's garlic is probably used up or dried out by now, you will welcome the addition of the garlic scape to your early summer cuisine.
      I like to chop the scapes into bite size pieces and use them as I would use chopped garlic.  For instance, saute them with chopped onion as a beginning to a stir fry or soup.
      Also they can be chopped into slightly longer pieces and steamed like green beans, and eaten as a vegetable side dish themselves, or in a medley with turnips or other seasonal vegetables.
A medley of cauliflower, snugar snaps and scapes on the steamer.

Wednesday, June 22, 2011

Freezing Peas

       Freezing peas is basically the same process as for freezing broccoli. After shelling the peas, place about two handfuls in a strainer and submerge them in boiling water for two minutes. (This is called "blanching." Blanching kills off the enzymes that would cause the quality of your food to deteriorate.)
       Then, carefully lift the strainer and drain excess hot water back into pan.
      At this point I dump the peas into the basket of the salad spinner, and plunge them into the ice water. (This ends the heating process, so that your vegetables are BLANCHED, but not COOKED.)
      Next I remove the ice cube, place the basket into the salad spinner, and spin to remove as much moisture as possible.*

*freezing tip: including too much water with the vegetables when you freeze them may be detrimental to the texture of your final product. The same is true of not chilling the vegetables sufficiently before packing them into freezer boxes.

Tuesday, June 14, 2011

Freezing Broccoli

       Freezing broccoli is a seven step process: soak, rinse, chop, blanch, chill, spin, and pack ino boxes.
Broccoli should be harvested when florets are fully formed but before any of the buds of the florets turn yellow. If caterpillars are present, soak unchopped broccoli heads in salted water (about 1 T. per gallon) for half an hour, then rinse well.

                                                                                                                                                                                  Here you see my setup, progressing from left to right...on the stovetop is a large pan filled with water to about an inch and a half from the top. In the pan is a large strainer. Next to the pan is the chopped broccoli, a digital timer, and cardboard freezer boxes lined with one pint plastic bags. In the sink is a large bowl of ice water to cool the broccoli after it has been blanched for two minutes. To the right of the sink is a salad spinner, to remove excess moisture before packing the vegetables into the boxes.
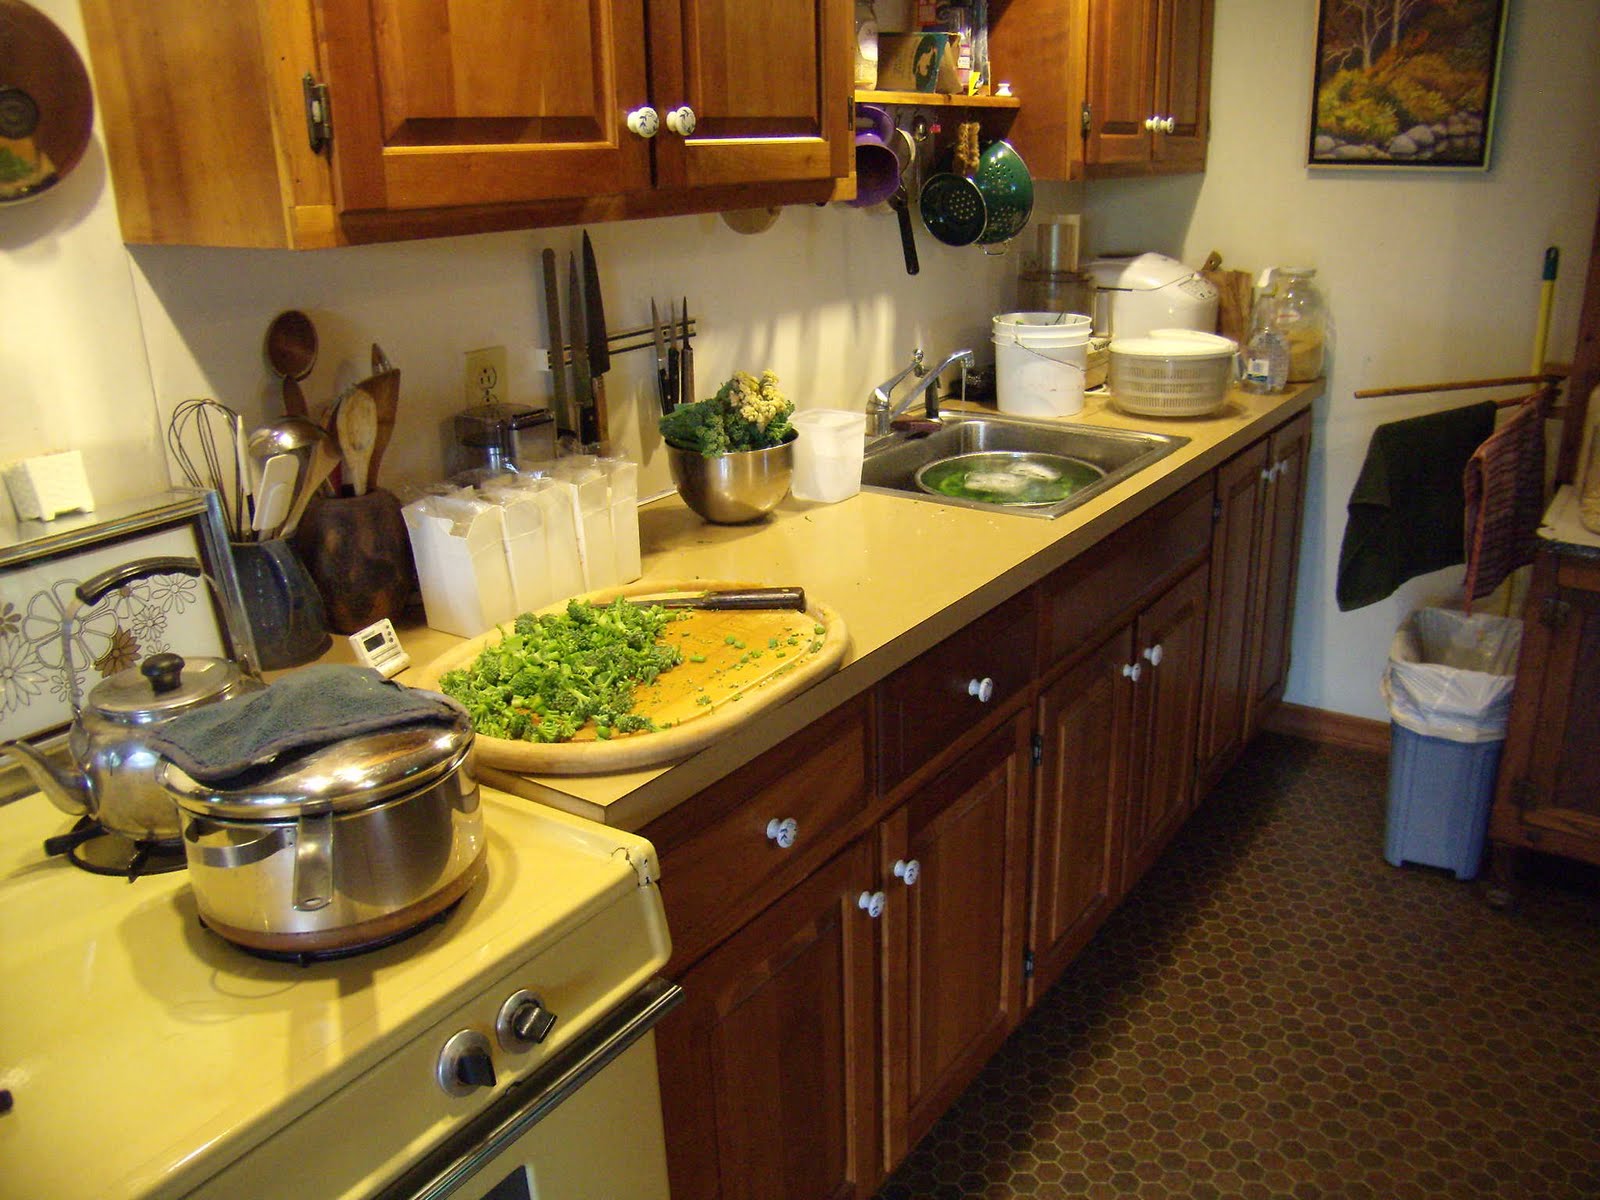
       As you chop the broccoli, bring water in a dutch oven to a full boil. Once the water is boiling, add a handful of chopped broccoli to the strainer and place cover on the pan. When the water resumes boiling, set the timer for 2 minutes.

      After two minutes, remove the strainer from the pan, and plunge the broccoli into ice water. I make ice cubes in one quart plastic boxes for this purpose. When thoroughly chilled, spin in salad spinner to remove excess moisture, pack into freezer boxes, seal, label, and freeze. Ahhh, in the winter months you will enjoy broccoli so bright green and tasty, you won't believe it!!